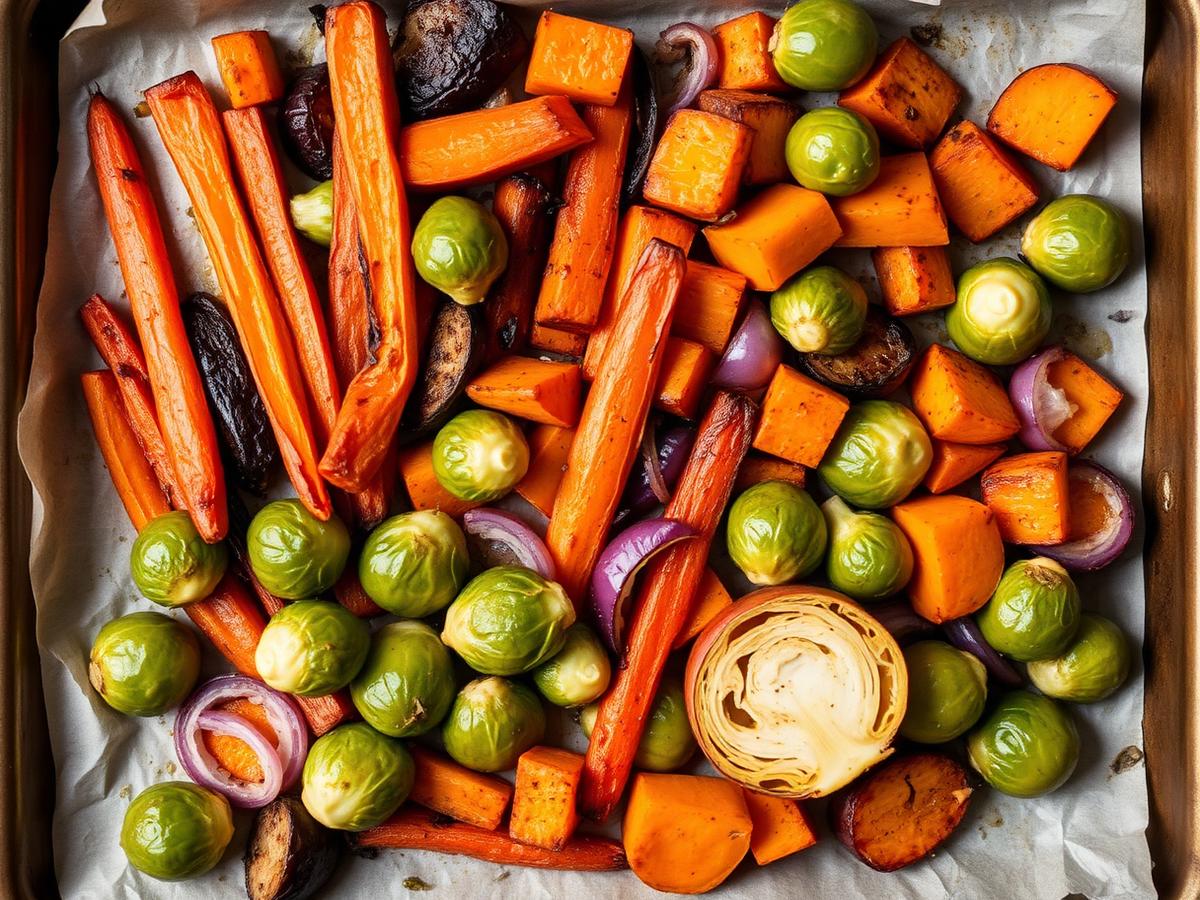
Sheet pan dinners get all the credit, but sheet pan sides are quietly the workhorse of any home kitchen. This honey-garlic version turns ordinary root vegetables and brussels sprouts into something genuinely crave-worthy: caramelized edges, tender centers, and a sticky-sweet-savory glaze that gets brushed on at the end.
The key is high heat and not crowding the pan. You want every piece of vegetable to touch the hot metal so the natural sugars caramelize into deep brown edges. Add the glaze too early and it burns; add it too late and it just sits on top. The trick is to brush it on during the final five minutes.
I'll often make a giant pan of these on Sunday and eat them all week — tossed with grains for a bowl, piled into wraps, or warmed up as a side to roasted chicken or fish.
Why you'll love it
- One pan, easy cleanup
- Deeply caramelized edges with tender centers
- Naturally vegan and gluten-free (with tamari)
- Meal-prep gold — eat all week in different ways
"Sheet pan dinners get all the credit, but sheet pan sides are quietly the workhorse of any home kitchen."
Ingredients
Serves 4
For the vegetables
- 1 lb (450 g) brussels sprouts, halved
- 1 lb (450 g) rainbow carrots, cut into 2-inch pieces
- 1 large sweet potato, cut into 1-inch cubes
- 1 red onion, cut into thick wedges
- 3 tbsp olive oil
- 1 tsp kosher salt
- 1/2 tsp freshly ground black pepper
For the honey-garlic glaze
- 3 tbsp honey (or maple syrup for vegan)
- 2 tbsp soy sauce or tamari
- 1 tbsp olive oil
- 4 cloves garlic, finely grated
- 1 tsp grated fresh ginger
- 1 tsp rice vinegar or apple cider vinegar
- Pinch of red pepper flakes (optional)
Instructions
6 steps · 45 min total
- 01
Preheat and prep
Heat oven to 425°F (220°C). Line two large sheet pans with parchment paper. (One crowded pan steams; two pans crisp.)
- 02
Season the vegetables
Toss all the vegetables on the pans with olive oil, salt, and pepper. Spread in a single layer with space between pieces — don't crowd them.
- 03
Roast
Roast for 25 minutes, rotating the pans halfway through. The vegetables should be tender when pierced and starting to caramelize at the edges.
- 04
Make the glaze
While the vegetables roast, whisk together all glaze ingredients in a small bowl until smooth.
- 05
Glaze and finish
Brush or drizzle the glaze over the vegetables. Return to the oven for 5 minutes — just enough to set the glaze without burning it.
- 06
Serve
Transfer to a serving platter. Finish with flaky salt and chopped parsley if you like.
Chef's tips
Small details that change the outcome
Cut the vegetables into similar-sized pieces so they cook evenly.
Use two pans, not one. Crowding steams the vegetables instead of roasting them.
Brush the glaze on at the end — the honey will burn if it goes in too early.
Add a sprinkle of toasted sesame seeds at the end for crunch and visual appeal.
Storage & reheating
Refrigerate in an airtight container for up to 4 days. Reheat in a 400°F oven for 8 minutes to crisp the edges back up. Avoid the microwave — it makes them soggy.
Frequently asked
Answers to the most common questions
Can I swap the vegetables?+
Any sturdy vegetable works: cauliflower, broccoli, butternut squash, parsnips, potatoes, or bell peppers. Just keep the total weight similar (about 3 lbs) and cut everything to a uniform size.
Can I make this without honey?+
Yes — maple syrup or brown sugar both work. The flavor will be slightly different but equally delicious.
What protein pairs well?+
Roast chicken thighs, baked salmon, crispy tofu, or seared steak all work beautifully. For a complete one-pan meal, add chicken thighs to one of the sheet pans for the last 25 minutes.
Written by
GreenFork Kitchen
Tested in a real home kitchen — three times before publishing, every time.